Wood Stripping
In the furniture repair business, there are many aspects that need to be considered. Not only do we handle reupholstering furniture, but we also offer wood restoration, door restoration, front door restoration and commercial wood restoration. Something that all of these services generally have in common is that the wood for these pieces will first need to be stripped. Sometimes you may not think that wood needs to be stripped in order to be properly restored, but nothing is further from the truth. Read on for some more information about our Long Island wood stripping techniques.
When your furniture shows signs of wear and tear it may be necessary for furniture repair. If your furniture is wooden, wood stripping may be necessary for you to achieve your desired result. Old paint, stains, and varnishes may need to be removed from your wooden furniture if you are restoring it to the best condition possible. When you strip the wood from your furniture, it is like starting with a clean slate. You will be able to restore or refurbish your wooden furniture any way you like.
While there are plenty of methods available to do your furniture refurbishment job yourself, it really depends on what your goal is. If you are dealing with old furniture and are curious as to how the wood stripping process works, it may be a fun project for you to take on on your own. However, if you have a collection of wooden antique furniture, and your goal is to restore it to its ultimate value and aesthetic condition, we highly recommend that you give us a call. The expert craftsmen at The Refinishing company have been trained in the most professional methods of wood stripping and wood restoration. We have become the leaders in Long Island furniture restoration over the years, and promise that when you hire us, you are taking the best care of your treasured or antique wooden furniture. Another thing to consider is that by hiring a professional to do your furniture wood stripping job, you are saving yourself a lot of time. You are also avoiding any safety risks, as our team is certified in use of various chemicals and equipment.
When you are dealing with wooden furniture, you may be tempted to just sand away the pain that is on its surface. While this method may work just fine if you are painting the furniture, stripping the wood is a more thorough technique. Wood stripping is also the ideal method if you are planning to restore your antique wooden furniture to its highest value. Sanding away varnishes or paint will often not remove every bit of the chemical. Wood stripping is a technique that will allow a fuller removal of any paint or chemical on the piece.
Although we highly recommend hiring us to take care of stripping the wood on your furniture restoration job, you may be curious as to what the process entails. Maybe you will even like to try furniture restoration as a hobby. If so, we can outline the basic method of wood stripping for you here.
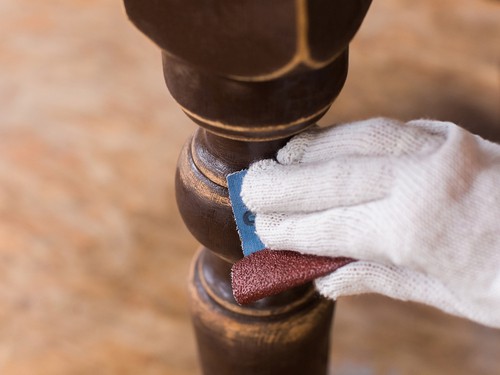
First, the wood will need to be prepped with soap and water. This will clean the wooden surface nicely. Then you may begin sanding the surface with 180 grit sandpaper until the paper is dull. After you have removed the first shiny layer of paint, wipe away all remaining dust. If the surface is rough, it is time to start wood stripping. You will want to protect yourself by wearing a face mask and a pair of thick rubber gloves. The materials you will need for a basic wood stripping job include:
- Paint Stripper chemical
- Steel wool
- Mineral spirits
- A metal or plastic scraper
- A set of paint brushes
- A medium-sized bowl
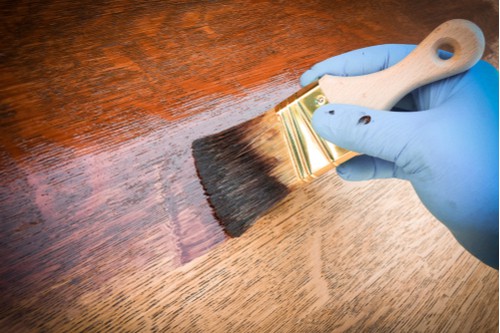
Wood stripper is usually available in liquid form from any hardware store. Before you begin, make sure that you are up to date on how to use the chemical wood stripper. The basic idea is to apply the wood stripper like you would paint, in very small sections of the piece that you plan to restore.
You should allow the wood stripper to sit until the pain that is beneath it begins to bubble and crack. After you notice this happening, you will scrape away as much paint as possible using a plastic or metal scraper. It is always best to get to removing the paint as soon as it starts bubbling. If you allow it to sit too long, it will again adhere itself to the surface.
The Refinishing Company's Services
Once you have scraped off all visible paint, you should apply another coat of wood stripper with the paintbrush. How often you do this depends on how much paint is on the piece that you are restoring. When you have scraped everything, you have reached the wood’s surface. Next you apply the mineral spirits to the wood with an old rag or a paper towel. If there is any remaining paint on your wooden furniture, you may scrub it away using steel wool. It is a good idea to rub the entire piece down with mineral spirits another time to be sure. This removes the stripper from the wood, allowing you a clean slate for applying any paint or stain that you plan to use. After your final wipe of mineral spirits, the wood is ready for its restoration!


If you plan on doing this yourself, you should be cautious to not make any errors. However, it is very easy to make some mistakes in the wood stripping process. Some of the most common do it yourself errors include:
- Not cleaning the surface thoroughly enough. Make sure you clean your wooden furniture very thoroughly. This could save you a lot of work in the long run.
- The wood stripping process is not fully complete. It is easy to miss a few spots here and there, so take your time and make sure every bit of paint and stain is removed.
- The waiting game. If you do not wait long enough for the wood stripper to do its job, you will have to scrape all of the old finish off. If the chemicals on the wood do not remove smoothly, you should leave the wood stripper on a little bit longer. On the other hand, waiting too long for the stripper to work can also cause a problem. If you do this, the paint on the wood can become hard again.
- Be sure to repair your furniture before endeavoring wood stripping. If you are fully restoring and repairing a piece of furniture, make sure to repair it before any sanding or stripping. This will allow you to have a cleaner, better finished product.
